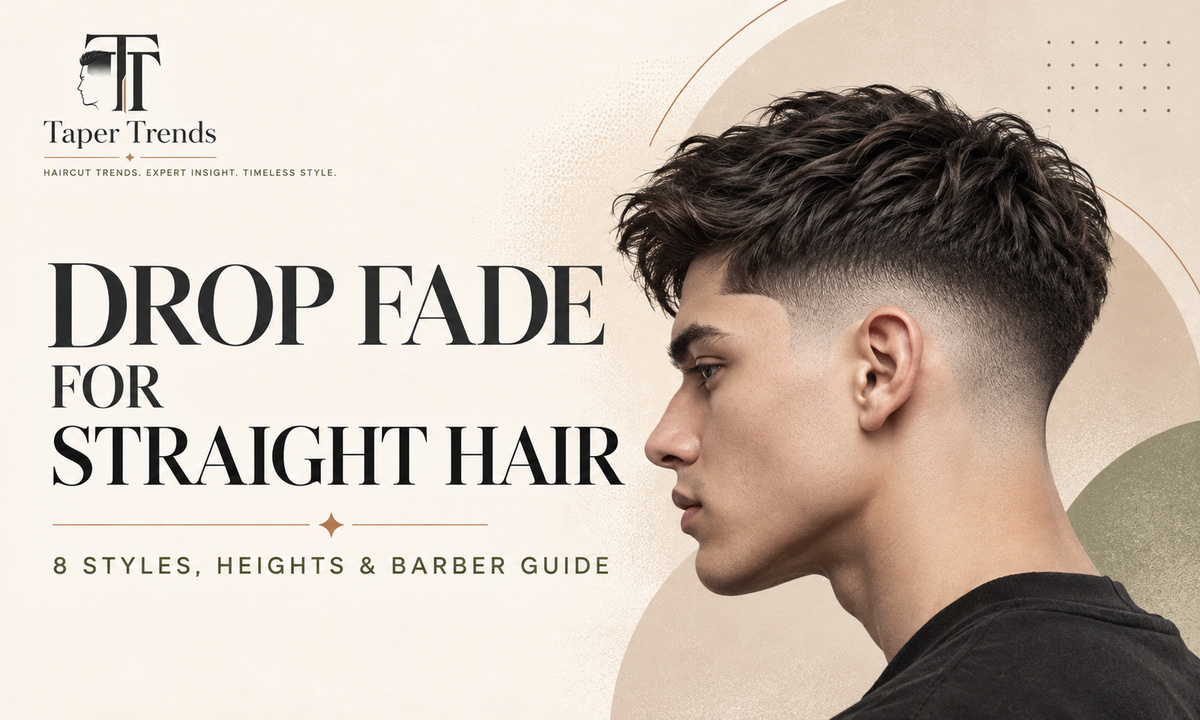
A drop fade on straight hair works well. The fade line curves downward behind the ear instead of running level around the head, so the cut follows the real shape of your skull. Straight hair lies flat against that curve, which makes a clean blend look sharp and a sloppy one obvious.
Whether it suits you depends on four choices: fade height, how short the base goes, how much length stays on top, and how much styling you'll do. This guide covers each, then gives you the exact words to use in the barber's chair.
For the drop shape on every texture, see our complete drop fade guide, and for every taper and fade on the site, start at the low taper fade haircuts guide.
What is a drop fade on straight hair?
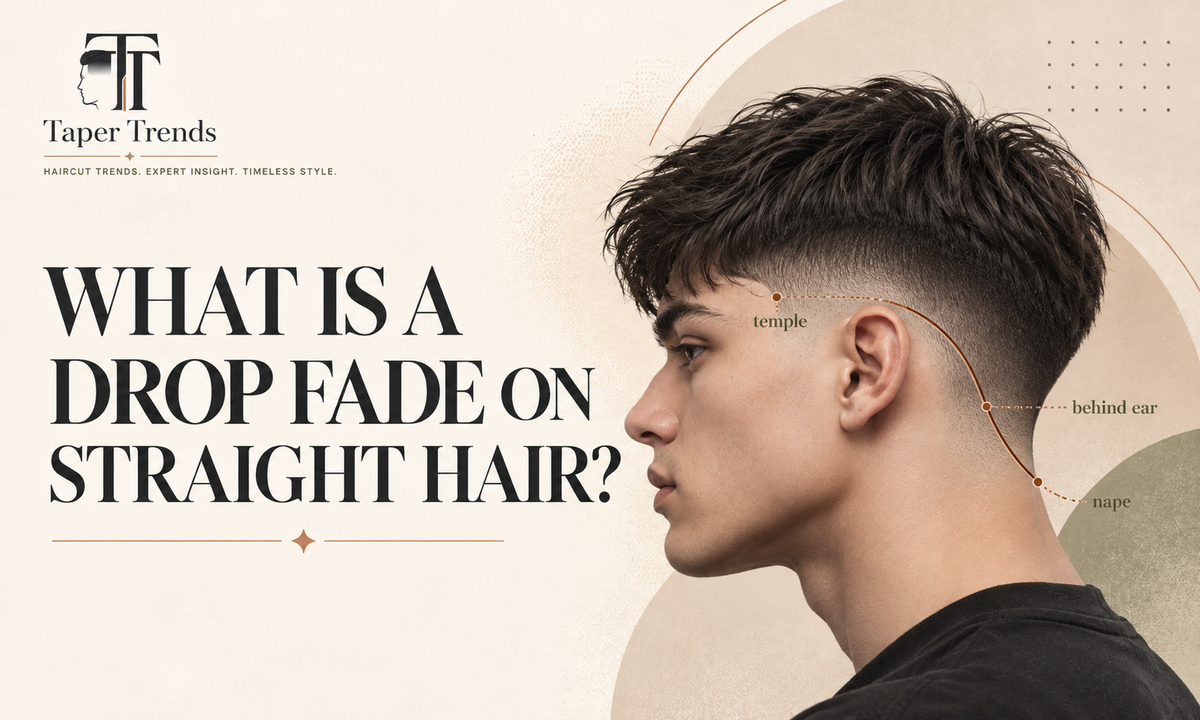
A drop fade is a fade whose guideline slopes downward from the temples toward the back of the head, curving behind the ear and bottoming out near the occipital bone before it tapers into the nape. On straight hair, the longer top sits above that curved blend in whatever style you choose, from a short crop to a slick back.
As Barber Style Directoryexplains, the skull isn't a cylinder, so a line that drops behind the ear tracks the head's actual shape and looks balanced from the side and from behind. A standard fade keeps its line roughly level all the way around. Our guide to the different kinds of fade haircuts lays every shape, height and finish side by side.
Two distinctions prevent confusion later. “Drop” describes the shape of the line, not how short it goes, so a drop fade can finish at bare skin, stubble, or a guarded length. And “straight” describes strand shape only. Thickness (fine or coarse) and density (how much hair grows on your scalp) are separate traits, and each changes the result, as our taper fade guide for thin and thick hair explains.
The same straight-hair logic runs through every side shape on the site. A burst fade on straight hair arcs around the ear instead of behind it, while the low taper fade for straight hair, mid taper fade for straight hair and high taper fade for straight hair keep the short sections at the hairline and nape.
Where the fade drops behind the ear
The guideline starts near the temple, at whatever height you and your barber agree on, then slopes lower as it travels back. Barber Style Directory's cutting guide puts the drop at roughly half an inch to an inch below the temple starting point, with the lowest point at or just above the occipital bone, the ridge at the lower back of the skull. Your barber will adjust that depth to your head shape: a deeper drop exposes more of the lower back of the head, while a shallower one stays closer to a standard fade. If you want the curve with a softer, taper-depth finish, our low taper drop fade guide shows how the arc works without bare skin.
Which drop fade height should you choose for straight hair?
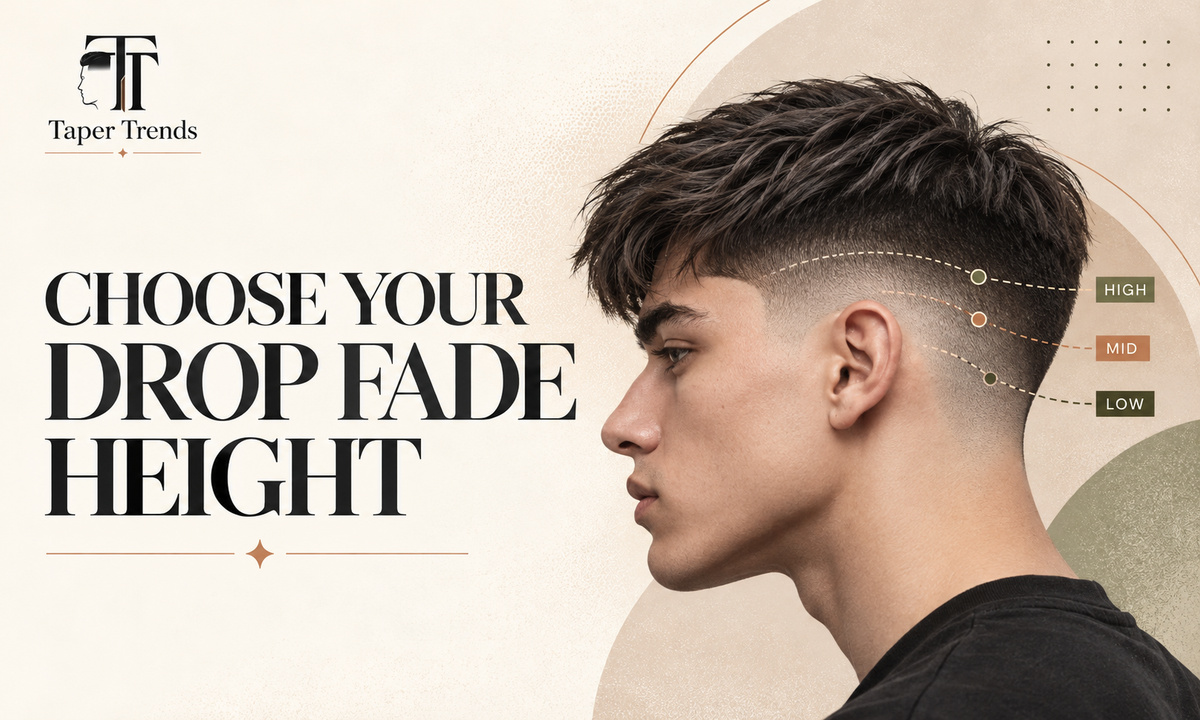
Choose a low drop fade for a restrained finish that keeps fullness on the sides, a mid drop fade for moderate contrast, and a high drop fade for a bold look with the most side hair removed. The heights are relative to your head rather than fixed measurements, so decide by how much contrast you want against the top.
| Variation | Where it starts | Contrast | Upkeep | Good fit for |
|---|---|---|---|---|
| Low drop fade | Just above the ear line | Subtle | Grows out most gracefully | Office-friendly cuts, side parts |
| Mid drop fade | Around the temple | Moderate | Average | Fringes, crops, quiffs |
| High drop fade | Near or above the temple | Strong | Shows regrowth fastest | High-contrast looks, longer tops |
The starting points follow the placements described by Pall Mall Barbers; individual barbers place them slightly differently. The same height trade-offs apply to a taper, which our low vs mid taper fade and mid vs high taper fade comparisons walk through.
Low drop fade for straight hair
A low drop fade starts just above the ears and curves toward the nape, leaving most of the side hair in place. It pairs naturally with a side part or low fringe and works with a guarded base if you'd rather not see skin. Pall Mall Barbers notes that low fades can grow for longer before losing their shape. Our low drop fade guide covers this height under every top, skin versus #1 base included.
Mid drop fade for straight hair
A mid drop fade begins around the temple, covering more of the sides than a low fade without climbing as high as a high one. The rear curve is easier to see, and it suits most top styles. If you can't decide, this is the sensible middle; ask your barber to show you where it will land before cutting. The mid drop fade guide shows where the line starts and the guard numbers behind it.
High drop fade for straight hair
A high drop fade takes the short section up near or above the temple, then still curves down behind the ear. You get strong contrast against a longer top and a clearer view of your head shape. The tradeoff is maintenance: Pall Mall Barbers says high fades need more frequent touch-ups to keep that contrast sharp. Our high drop fade guide compares skin, #0.5 and #1 finishes at this height.
Does a drop fade work for fine, thick, or stubborn straight hair?
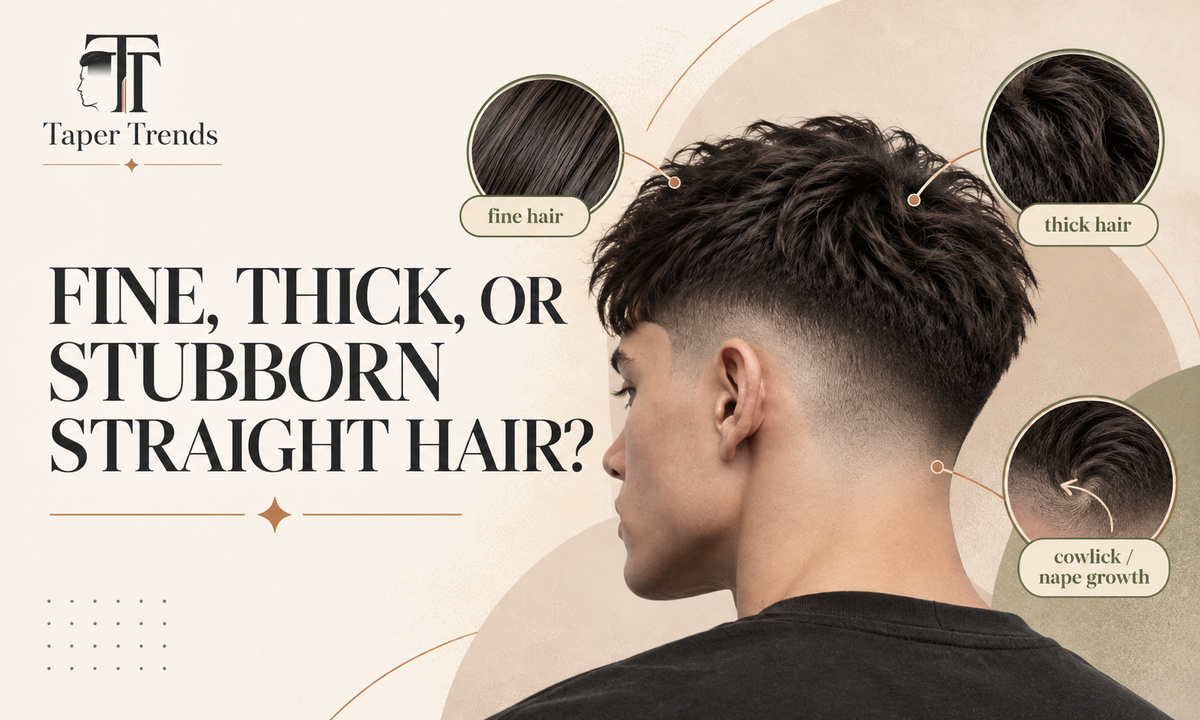
Yes, almost any straight hair can wear a drop fade, but each type needs a different plan. Fine hair needs enough length on top to hold a shape. Thick or coarse hair needs its side bulk controlled so it doesn't push outward. Hair with a nape cowlick needs a barber who checks growth direction before cutting the curve.
Fine or low-density straight hair
According to Markcutit's barbers, finer straight hair tends to lie flat and cling to the head. Keep a compact crop with enough length to hold its shape, use a lightweight product, and ask the barber not to strip out too much bulk. Judge how much scalp shows with your hair dry, not wet. A haircut can disguise thinning but can't treat it, so see a dermatologist if your density is changing. Finer, straighter hair is common on European heads, which is why our low taper fade for white guys, mid taper fade for white guys and high taper fade for white guys guides spend so much time on density.
Thick or coarse straight hair
Markcutit notes that thick, coarse straight hair stands out from the scalp at the sides and crown. A drop fade removes most of that problem hair, and if the sides still flare, taking the fade high enough to clear the widest part of the head helps. On top, point cutting removes weight without the short, root-level hairs that thinning shears can leave. Dense, poker-straight hair gets its own treatment in our low taper fade for Asian hair and mid taper fade for Asian hair guides, and if you'd rather keep that volume as a feature, the low taper fade for fluffy hair works with it instead.
Cowlicks and difficult crown or nape growth
A cowlick, a spot where hair grows in a spiral, has nowhere to hide on straight hair. Fade Line's straight-hair guidepoints out that a drop fade's lowest point usually lands right where nape cowlicks sit. Ask your barber to check the nape before setting the guideline and to cut the taper with the spiral rather than across it. Styling product rarely rescues a taper cut against the grain.
What are the best drop fade styles for straight hair?
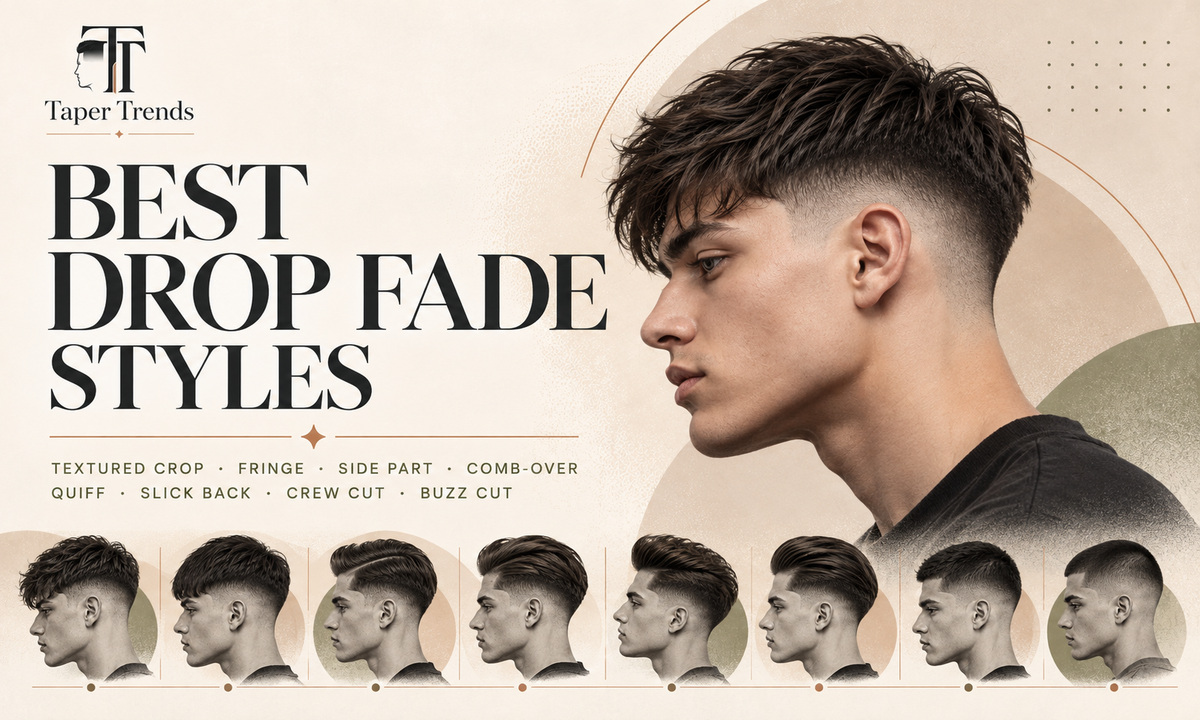
Eight top styles work especially well over a drop fade on straight hair: the textured crop, forward fringe, side part, comb-over, quiff, slick back, crew cut, and buzz cut. They differ mainly in top length and daily styling time, so start with an honest answer to how many minutes you'll spend in front of the mirror.
Textured crop and forward fringe
1. Textured crop
A textured crop keeps the top short, usually 3 to 6 centimeters (about 1¼ to 2⅓ inches), according to Markcutit, with point-cut ends at uneven lengths that prop each other up. That stops straight hair from lying flat. If your hair is fine, ask the barber to leave enough weight that it doesn't collapse. Our French crop low taper fade guide shows how to size and style that short, forward top.
2. Forward fringe
A forward fringe leaves more length at the front so it falls onto the forehead. Wahlcontrasts the longer, uneven bangs of a textured fringe with the Edgar cut's straight bangs. Straight hair shows every blunt edge, so ask for point-cut ends if you want a soft fringe. Our drop fade textured fringe guide is the full version of this pairing, the low taper fade fringe shows it over a softer side, and the mid taper fade Edgar covers the blunt, straight-across alternative.
Side part and comb-over
3. Side part
A side part follows your natural parting, so it takes little forcing. Over a low drop fade it looks tidy enough for most workplaces. Keep enough length above the ears for the part to sit, and ask for a shaved hard part only if you want one. Our side part low taper fade guide covers part placement and the hard-part decision in detail.
4. Comb-over
A comb-over directs a longer top across the head on purpose. Markcutit notes that a comb-over fade uses straight hair's tendency to lie in one direction. It needs more length than a side part and a little product to stay put. The low taper fade comb over guide shows how much length that takes.
Quiff and slick back
5. Quiff
A quiff lifts the front up and back off the forehead. It needs real length at the front, and flat or fine straight hair almost always needs a blow-dry to hold the height. It's the highest-effort style here, so skip it if you don't want a daily routine. For a rounder, fuller lift, our low taper fade blowout and mid taper fade blowout guides cover the dryer technique.
6. Slick back
A slick back combs the whole top backward with no part. Markcutit says a slick back with a fade lies smooth and holds well on straight hair. You'll need enough length to reach past the crown. Effort is moderate: a comb and product, usually no dryer. Our low taper fade slick back guide covers the length and product.
Crew cut and buzz cut
7. Crew cut
A crew cut leaves the front slightly longer than the crown for a structured shape that needs almost nothing in the morning. With little hair on top, the drop curve stays clearly visible, so blend quality matters more than usual. Our low taper fade for short hair, mid taper fade for short hair and high taper fade for short hair guides cover more short tops.
8. Buzz cut
A buzz cut keeps the top close to one length, turning the fade into the main design feature. Any unevenness shows immediately. Ask which guard your barber will use on top, because guard numbers vary across brands. Our low taper fade buzz cut, mid taper fade buzz cut and high taper fade buzz cut guides show the cut at each height.
Still torn? Treat this table as a starting point for the conversation with your barber, whose read of your head shape and growth pattern should win.
| If you... | Start with |
|---|---|
| Have fine hair and want little styling | Low or mid drop fade with a textured crop |
| Have thick hair with sides that stick out | Mid drop fade with weight removed above the fade |
| Want a neat, office-friendly look | Low drop fade with a side part |
| Want maximum contrast | High drop fade with a quiff or slick back |
| Don’t want bare skin | Low or mid drop fade on a guarded base |
| Have a nape cowlick | Any height, with the drop placed after a growth check |
Prefer a center part? Our low taper fade middle part and mid taper fade middle part guides cover the curtain-style top, and the drop fade mullet keeps the same curve behind the ear with length left at the back.
What should you tell your barber for a drop fade on straight hair?
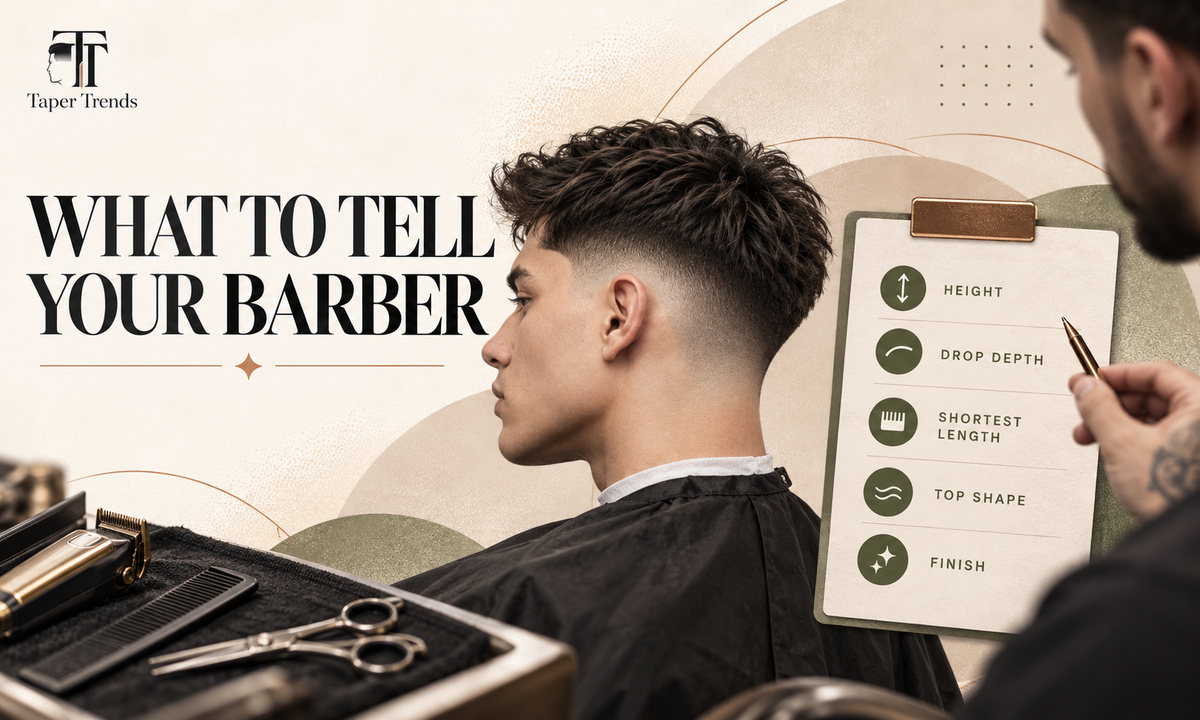
Give your barber five specifics: fade height, how far the curve drops behind the ear, the shortest length, the shape and length of the top, and the finish. Saying “drop fade” alone leaves too much open to interpretation, so bring side and rear reference photos and agree on each point before the clippers come out.
Five specifications that prevent misunderstandings
- 1. Fade heightLow, mid, or high.
- 2. Drop depthHow far the curve descends behind the ear.
- 3. Shortest lengthBare skin, stubble, or a guarded base such as a #½ or #1.
- 4. Top shapeLength in inches, fringe or part, and how much weight stays at the crown.
- 5. FinishMatte or polished, with a natural neckline or a sharper edge.
Guard numbers are handy shorthand, not a universal standard. On Wahl's standard guide combs:
| Wahl guard | Approximate length left |
|---|---|
| #1 | 1/8 inch (3 mm) |
| #2 | 1/4 inch (6 mm) |
| #3 | 3/8 inch (10 mm) |
| #4 | 1/2 inch (13 mm) |
Wahl UKlists a #1 at 3 mm and a #4 at 13 mm and warns that sizes may differ between brands; Wahl USA notes that each guard steps up by 1/8 inch. Wahl UK also says the bare blade still leaves roughly 0.5 to 0.8 mm of hair, so “no guard” isn't bare skin. For a true skin finish, Barber Style Directory lists a foil shaver among the tools. Our clipper guard size chart converts every number to inches and millimeters.
A ready-to-use request and photo checklist
Here's one example you can adapt:
“I'd like a mid drop fade with a #½ base, dropping lower behind the ears. Leave about 2 inches on top for a textured, forward style, and keep some weight at the crown.”
That's a sample, not a default, so swap in your own height, base, and top length. Then bring a front view, a side profile, and a rear three-quarter view. Pick references with hair close to yours: Markcutit observes that dark straight hair against lighter skin shows fade lines most, while fair hair hides small ones, which our low taper fade for blonde hair guide shows up close.
If you'd rather build the script step by step, our barber brief generator turns the same five decisions into a note you can show on your phone, and our guide to what a low taper fade looks like from every angle shows the kind of side and rear shots worth saving.
How does a barber create the drop shape on straight hair?
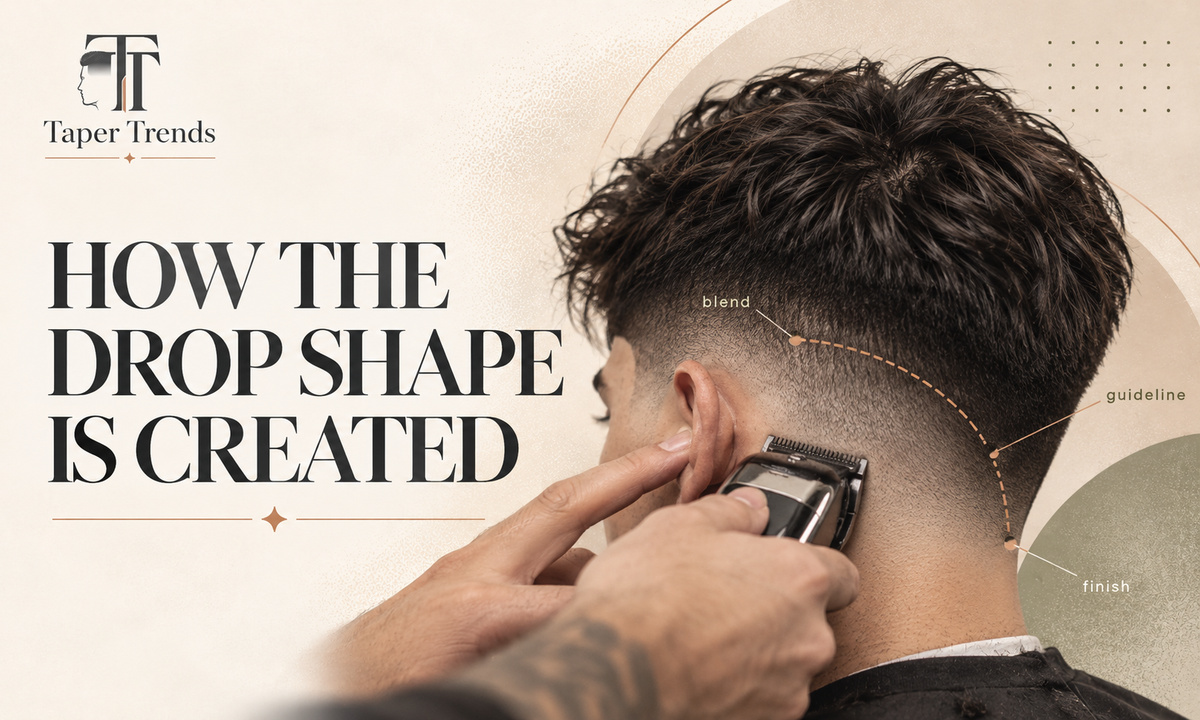
The barber agrees on height and base length with you, sets a curved guideline that descends behind the ear, blends upward through longer guards, connects the sides to the top, and checks the result from the side and back. Barbers order these steps differently, so treat this as a guide to what good work looks like rather than a recipe.
The curved guideline, blending, and finishing checks
- Consultation. Height, drop depth, and base length are settled before cutting.
- The guideline. It starts near the temple and slopes lower behind the ear, as Barber Style Directory describes.
- Blending upward. The barber steps through longer guards and uses the taper lever to soften the line between them. Wahl says moving the lever between positions changes the cutting length by 1/16 inch, the same blend our step-by-step fade guide walks through.
- Connecting the top. The faded sides meet the longer hair without a hard ridge, with extra care at the crown and nape.
- Inspection. From the side, a good drop fade reads as one smooth curve with no ledge, shelf, or patchy spot.
Ask to see the back in a hand mirror before you leave. The curve behind the ear is hard to see and reach on your own head, so book a barber rather than attempting this at home. On textured hair the same steps hide small errors better, which is why our drop fade for curly hair and drop fade for Black men guides plan the base length differently.
How do you style a drop fade with straight hair?
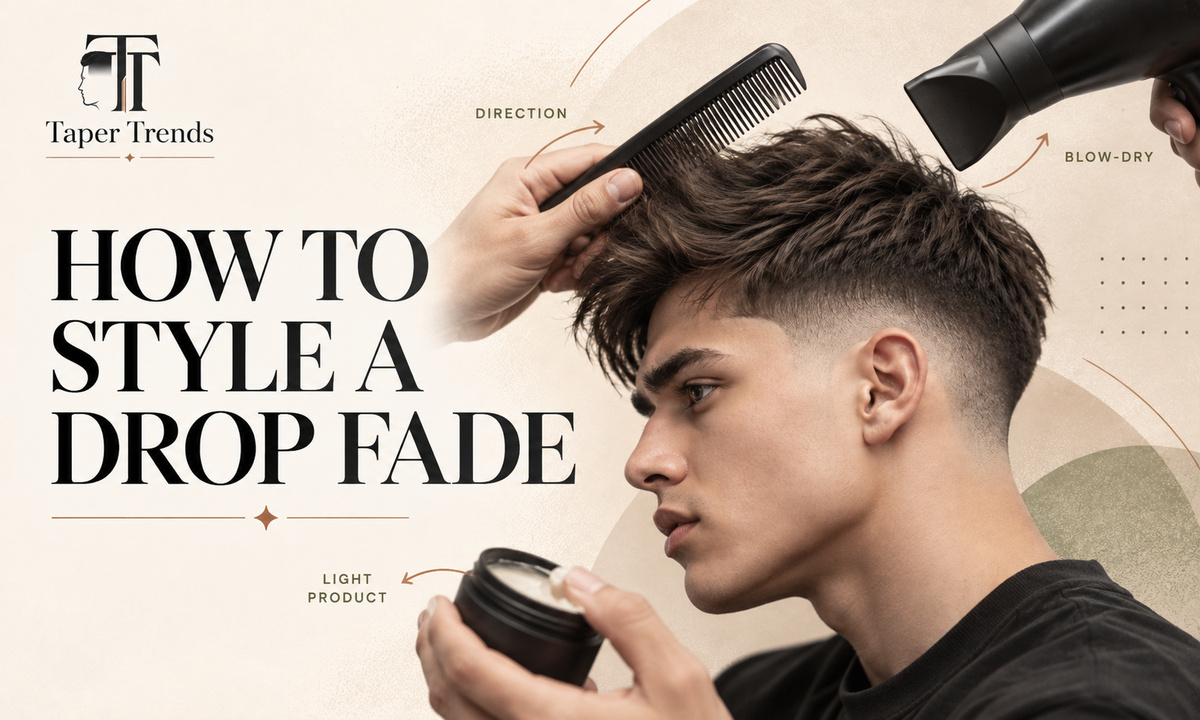
Only the hair above the fade needs styling. Decide the direction first, set it with a quick blow-dry while the hair is still slightly damp, then work in a small amount of product matched to your hair's weight. Fine straight hair needs a light product, while thick straight hair can handle a firmer hold.
Matte texture for a crop or fringe
- Start with clean hair blotted in a towel. The American Academy of Dermatology recommends wrapping wet hair rather than rubbing it, and letting straight hair dry a little before combing.
- Blow-dry toward your intended shape on low or medium heat. The AAD advises limiting blow-drying and using a heat-protecting product.
- Warm a small amount of matte product between your palms. American Crew, for example, markets its medium-hold Matte Clay Cream for fine or straight hair, applied to dry or towel-dried hair.
- Work it in from the roots out, then separate small sections with your fingertips.
Controlled lift or shine for a quiff or side part
For a quiff, dry the front up and back at the lowest heat that works, lifting the roots against their natural fall, then set it with a little product. For a side part, dry the hair along your natural part and comb it into place. Matte looks natural, while a medium-hold pomade, which Barber Style Directory recommends for slicked-back styles, adds shine. On fine hair, use less than you think; heavy product flattens straight hair quickly. Our guide to styling a taper fade covers the blow-dry and product basics for every texture.
Drop fade vs taper vs burst fade: what's the difference?
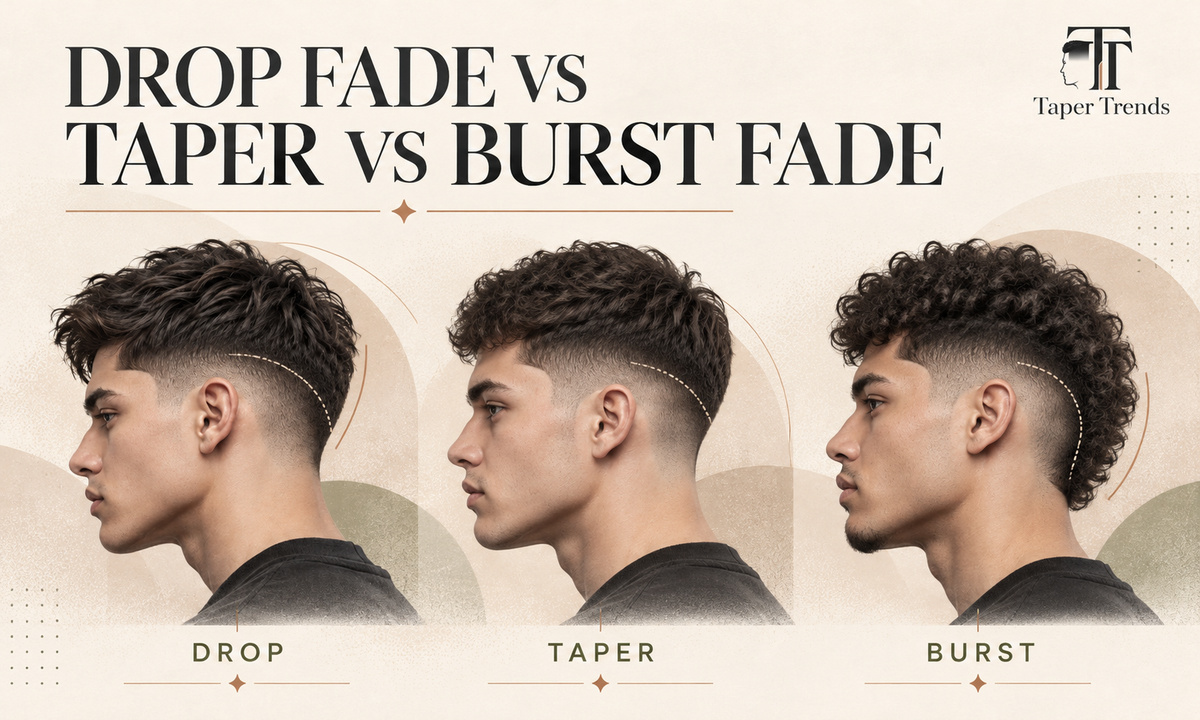
A drop fade curves down behind the ear and carries that lowered line around the back of the head. A taper shortens hair mainly at the hairline and nape, leaving more length on the sides. A burst fade fans out in a rounded arc around the ear and usually keeps length at the back. Shop vocabulary varies, so bring a photo. Our drop fade vs burst fade guide goes deeper on those last two.
| Haircut | Defining shape | Back of the head | Overall look |
|---|---|---|---|
| Drop fade | Line descends behind the ear | Faded, lowest near the occipital bone | Contoured sides and back |
| Taper | Gentle shortening at hairline and nape | Mostly full above the neckline | Natural and conservative |
| Burst fade | Rounded fan centered behind the ear | Longer hair kept at the back | Close to a softened mohawk |
Pall Mall Barbers describes a taper as a gentler shortening around the hairline and nape, and Barber Style Directory defines the burst as a radial fade that fans out from behind the ear while leaving more length at the back and top.
For each alternative up close, see our taper fade guide, the burst fade haircut guide and the burst fade vs taper fade breakdown. Our taper vs fade explainer and low taper vs low fade comparison cover where one word ends and the other begins.
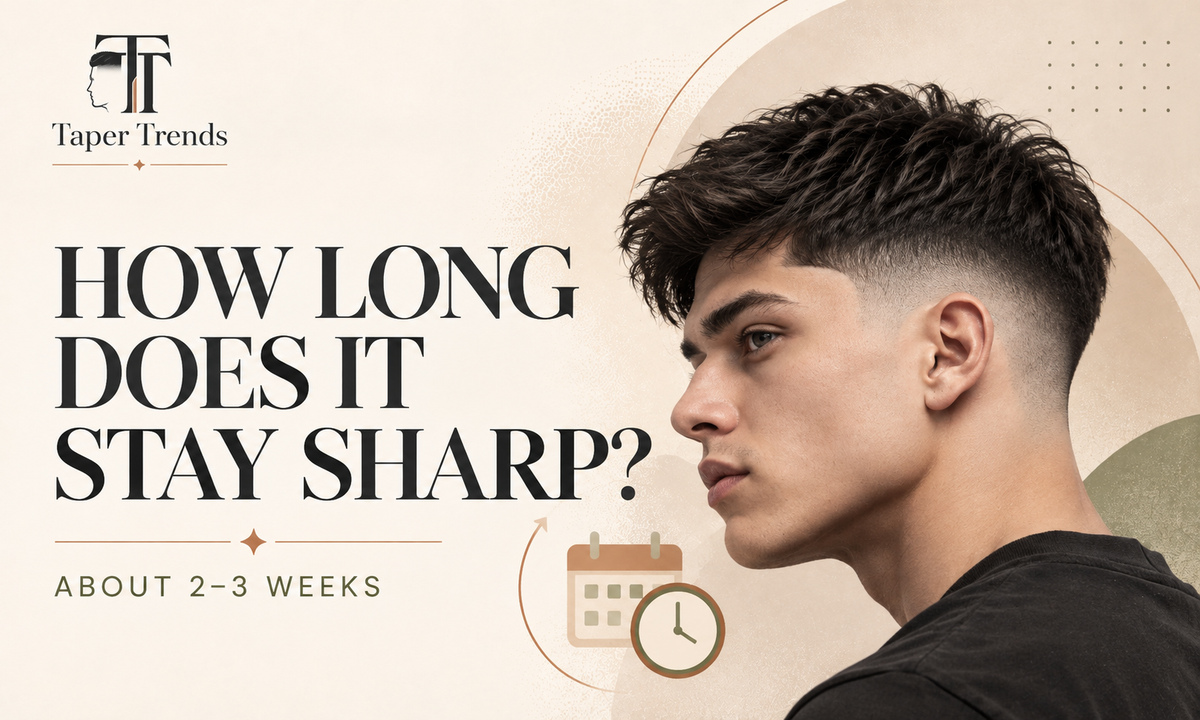
How long does a drop fade stay sharp?
Expect a crisp drop fade to start looking soft after about two to three weeks, sooner with a skin finish and later with a guarded base. Scalp hair grows about 1 centimeter a month, according to Cleveland Clinic, but the contrast of your fade, not raw length, decides when the curve behind the ear blurs.
Touch-ups, growing out, and scalp care
Barbers don't agree on one number. Barber Style Directory suggests every 10 to 14 days for a crisp result, Fade Line suggests two to three weeks for straight hair, and Pall Mall Barbers says most men find two to four weeks works. A high skin fade shows regrowth within days, while a low fade on a #1 stretches longer. Markcutit adds that straight hair shows growth sooner than wavy or curly hair, which you can see by comparing our low taper fade for wavy hair and mid taper fade for wavy hair guides.
Rebook when the curve behind the ear blurs, the neckline turns fuzzy, or the top stops holding its shape. To grow the cut out, skip the fade and ask for shape-ups that keep the sides even as they lengthen. Our long hair low taper fade and mid taper fade long hair guides show where that can lead.
Between visits, Barber Style Directory recommends moisturizing the faded skin near the nape, which collars and pillows can irritate. The AAD says people with straight hair and an oily scalp may want to shampoo daily, so let your scalp set the schedule. On a two- or three-week cycle, our barber tip calculator works out what to leave at the chair.
Frequently asked questions
Can you get a drop fade without shaving to the skin?
Yes. “Drop” refers to the curve, not the length, so you can ask for a guarded base such as a #½ or #1, often called a shadow fade. You’ll see light stubble and softer contrast instead of bare skin, and the cut usually stays presentable longer between visits.
Can you wear a drop fade with long straight hair on top?
Yes. Keep whatever length you want and ask your barber to connect it smoothly to the faded sides. With a long top, the curve behind the ear becomes the main visible detail, so check weight and direction once your hair is dry and styled.
Does a drop fade work with a receding hairline?
It can, because the fade sits at the sides and back; your front hairline and density shape the result more. Cleveland Clinic notes that male pattern baldness most commonly affects the crown and frontal hairline, so if recession is recent or fast, talk to a healthcare provider too.
Can a drop fade be blended into a beard?
Yes, if both are planned together. The sideburn is where the fade meets the beard, so settle the beard’s length and edge first, then have the barber fade the sides down into it and check both sides for symmetry.
Is a drop fade appropriate for school or professional workplaces?
Usually, especially low or guarded versions with a neat top such as a side part. A high skin fade reads bolder. Dress codes vary between schools and employers, so check the written policy if you’re unsure.
Can a regular fade be changed into a drop fade at the next haircut?
Often, but it depends on what’s left. A drop fade needs enough length behind the ear to cut the curve into, so if your last fade was taken high at the back, your barber may ask you to let it grow for a week or two first.
Planning a beard alongside the cut? Our drop fade with beard guide covers the sideburn blend in detail, and the low taper fade with beard shows the softer version, while the skin fade with beard takes the sides to bare skin. For a longer top, see low taper fade for medium-length hair. For school-friendly versions, our low taper fade for boys with straight hair, mid taper fade for boys and burst fade for boys guides keep the contrast parent- and dress-code-friendly. When the sides go all the way to bare scalp, our low vs mid vs high skin fade guide helps you pick the right height.
Your next step
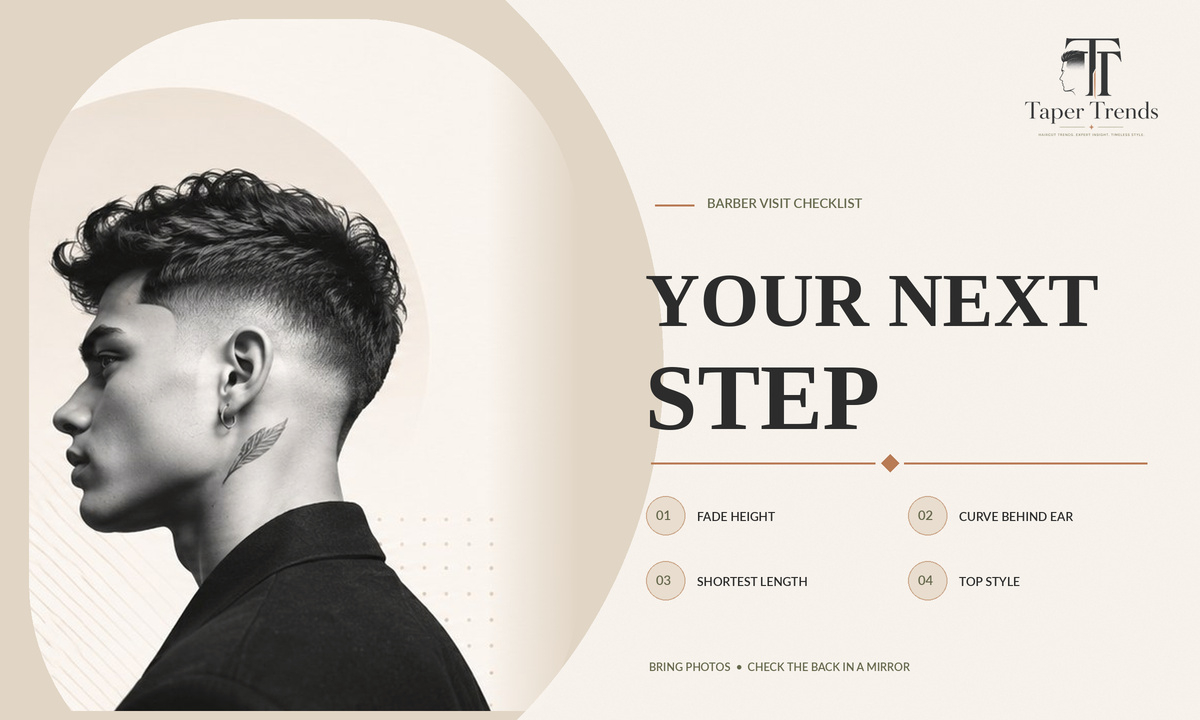
A good drop fade on straight hair comes down to four decisions: the height, the curve behind the ear, the shortest length, and a top style you'll actually maintain. If you're unsure, start with a low or mid drop fade on a guarded base and go shorter next time. Not sure which top suits your face? Our face shape detector gives you a starting point in a few seconds.
The bottom line
Straight hair shows every step in a drop fade, so the cut is only as good as the plan behind it.
Write down your five specifications, bring front, side, and rear photos, and check the back in a mirror before you pay.
Want more fade guides for straight hair?
Browse clean, barber-ready breakdowns for every hair type.